In this article, I will talk about How to configure Neovim. It covers basic setup - syntax highlighting, wrapping/unwrapping, showing statusline, cursorline, cursor position, number line, popup menu, splits, tabline, tabs as spaces, smart indentation, spelling check, highlight on yank, colors, etc.
I have tested these settings only on Neovim. But most of these commands should work with Vim as well. Please note that the commands in Lua language will only work with Neovim. I will try my best to tell you about these Lua or any other specific differences between Vim and Neovim as you proceed.
If you want to apply these changes, you need to restart your Neovim. Or execute, the command the command :source $MYVIMRC
The configuration file in Neovim
To begin with, you need to create a configuration file ~/.config/nvim/init.vim. For vim, this configuration file is ~/.vimrc. This is where all the settings will go to.
📓 Recommendation: Separate your configuration file into various files - basic settings in one file, plugins in another file, and so on. Then you can source all these files into init.vim. It makes your configuration looks clean and you can reach any part easily.
My configuration file init.vim looks like the following:
" General Settings
source $HOME/.config/nvim/vim-plug/plugins.vim
source $HOME/.config/nvim/general/settings.vim
source $HOME/.config/nvim/general/abbreviations.vim
source $HOME/.config/nvim/general/nowrap.vim
source $HOME/.config/nvim/keys/mappings.vim

" Plugin Configuration
source $HOME/.config/nvim/keys/which-key.vim
source $HOME/.config/nvim/plug-config/fzf.vim
source $HOME/.config/nvim/themes/wal.vim
source $HOME/.config/nvim/themes/lualine.lua
source $HOME/.config/nvim/plug-config/fidget.lua
source $HOME/.config/nvim/plug-config/sneak.vim
source $HOME/.config/nvim/plug-config/floaterm.vim
source $HOME/.config/nvim/plug-config/vim-markdown.vim
source $HOME/.config/nvim/plug-config/lspconfig.lua
source $HOME/.config/nvim/plug-config/diagnostics.lua
source $HOME/.config/nvim/plug-config/auto-cmp.lua
source $HOME/.config/nvim/plug-config/devicons.lua
source $HOME/.config/nvim/plug-config/telescope.lua
source $HOME/.config/nvim/plug-config/null-ls.lua
source $HOME/.config/nvim/plug-config/rainbow.vim
source $HOME/.config/nvim/plug-config/yggdroot-indent.vim
source $HOME/.config/nvim/plug-config/ultisnips.vim
As you can see in the above file, my basic settings are in the file $HOME/.config/nvim/general/settings.vim, plugins in the file $HOME/.config/nvim/vim-plug/plugins.vim, shortcut keys in the file $HOME/.config/nvim/keys/mappings.vim, individual plugin configurations in their respective files, and so on. I have sourced these files using the source command source. This source command works just like that in the bash scripts.
Comments start with ". And empty lines are ignored.
Now, open the init.vim using your text editor and add the following line:
" General Settings
source $HOME/.config/nvim/general/settings.vim
Now, create the file $HOME/.config/nvim/general/settings.vim add up the following settings
Leader key in Neovim
The leader key is used to map keys in the nvim. It can be a comma or space. To use space as a leader key, use the following command:
let g:mapleader = "\<Space>"
Now, you can use this to map your keys like the following:
map <Leader>bd :bdelete <CR>
To learn about basic keys in Neovim/Vim, look at this article.
Encoding in Neovim
To set encoding use the following commands in your init.vim:
set encoding=utf-8
set fileencoding=utf-8
Syntax highlighting in Neovim
Use the following command to enable syntax highlighting. By default, it is enabled. Enabling again conflicts with FileType command. So, you do need need to include this line in your configuration file if you include the FileType commands too.
syntax enableHow to configure wrapping in Neovim
By default, vim automatically wraps long lines. This is a sane default. But if you want to display long lines as just one line, use the following:
set nowrapNow, you will need to press the right arrow key or l key a lot to read any line.
Or, you can enable no-wrapping only for specific files. I will talk about that later.
How to configure hard wrapping in Neovim
First, know what is soft and hard wrapping:
Soft wrapping: You already know it. It is the wrapping I talked about in the above lines. When your text editor is unable to show you the full line, it wraps the line. But the text editor does not enter a newline character in your file.
Hard wrapping: Here, your text editor enters a newline character in your file. You can enable this if you want to force yourself to always code in small lines.
To enable hard wrapping use the option textwidth as given below
set textwidth=80Now, Nvim will press Enter after you have typed 80 characters in your file. By default, it is off. Set it to 0 for turning it off (in case some nasty plug-in is turning it on).
How to make neovim move up/down while pressing h/l at the start/end of the line
By default, when you are at the beginning or end of a line in nvim and press the key h or l, the cursor will not go to the previous or next line respectively. To make it go previous or next line, use the option, whichwrap:
set whichwrap+=<,>,h,lNow, pressing h or l at the beginning or end will move the cursor to the previous or next line respectively.
How to show cursor position in Neovim
To show the cursor position all the time, set the ruler option on. Now, the position of the cursor i.e. line number and column number at which this cursor is located will be shown at the bottom right corner.
set ruler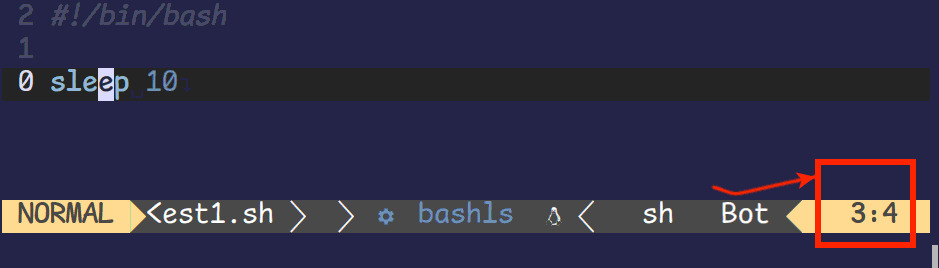
fig: ruler in neovim showing cursor's line and column number
Your Neovim might show it a little differently because I have set a plugin to make it look fancier.
How to configure command height in Neovim
To set command height use the variable cmdheight. It is used to show the command prompt i.e. the line when you hit colon : in vim/neovim.
By default, it is 1. Make it 0, if you want more screen space. If you have lots of screens (like a big screen monitor), then increase it. If it is 0, it will only appear when you hit the colon button.
set cmdheight=1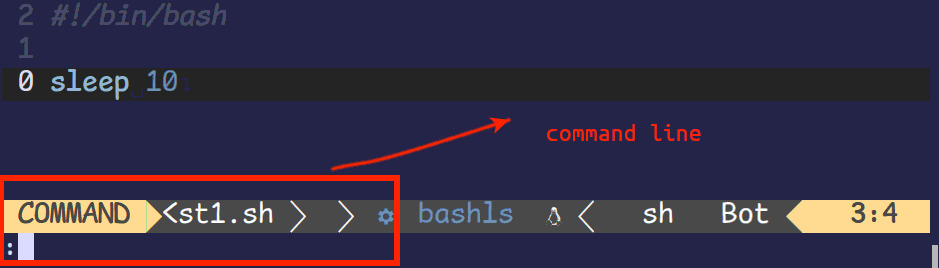
fig: set cmdheight to set the height of the command line in neovim/vim
How to enable mouse support in Neovim
To enable your mouse, set the mouse variable to i for insert mode only, a for all modes (insert, normal, and all others).
📓 Recommendation: Turn it on because it will enable new features and at the same time, you can disable it temporarily using the shift button. For example, shift+click, drag and drop, etc. will not be transferred to nvim; instead, they will be transferred to your backend i.e. the terminal.
set mouse=aHow to set the popup menu smaller
To make the popup menu bigger/smaller, use the variable pumheight. Please note that a popup menu appears when you right click on Neovim.
set pumheight=10
fig: popup menu appears when you right-click in neovim
Set it to 0 if you want your whole screen to be taken over when there is a popup menu. Ignore it if you want the default setting.
Treat dash-separated words as a word text object
Use the following command to treat dash-separated words as a word text object:
set iskeyword+=-How to configure horizontal and vertical splits in Neovim and Vim
When you set the option splitbelow, Horizontal splits will automatically be below.
set splitbelow
fig: splits in neovim/vim
Similarly, to set the option splitright, use:
set splitrightThese features splitright and splitbelow also looks more natural, especially for people who write from left to right and top to bottom (for example in English)
Now, Vertical splits will automatically be to the right.
Using Tab as 2 Spaces in Neovim
If you use 2 spaces for a tab, you need to configure neovim for this.
set expandtab
set shiftwidth=2
set softtabstop=2
set tabstop=2
This is useful if you use a lot of tabs in code and your monitor's screen size is very small.
Set smart indentation in Neovim
Smart Indentation puts indentation automatically at appropriate places after you type {, }, or #. Now, you don't need to type tabs after these characters. To turn it on, use the following configuration:
set smartindent
set autoindent
Displaying status line in Neovim
The status line is the bottom bar you see above the command line.
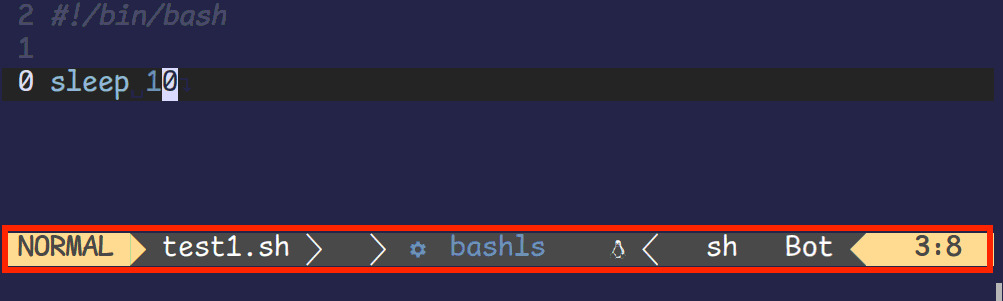
fig: statusline in vim and neovim
To display it all the time, set the option laststatus to 2.
set laststatus=2Set it to 0 if you don't want to see it at all, to 1 to display the statusline only when there are at least 2 windows.
📓 Recommendation: Set the laststatus to 2 if you want to see all information related to your files and Neovim.
How to display the line numbers in the left column in Neovim
To display the line number in the left column:
set numberTo make it disappear, which is the default, use the following:
set nonumberHowever, I use the option relativenumber. I find it more useful to execute the commands like 3j in the normal mode.
set relativenumber
fig: line number in neovim/vim
How to increase or decrease the size of the number column in Neovim
You turned on the number column using the above option relativenumber or number but you might find the width of the column to be very high. This is bad if you have a small screen monitor (like a 14-inch laptop).
To bring it down, use another option numberwidth. I find the value 3 to be the smallest and best.
set numberwidth=3How to enable highlighting of the current line
To enable the line of your cursor, use the option cursorline:
set cursorline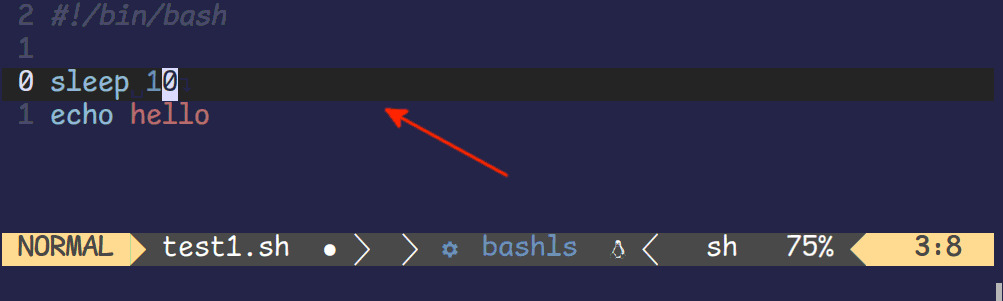
fig: cursor line in vim/neovim
This feature is useful while editing a large file because you might lose the position of your tiny cursor - find that is difficult.
How to show tabline in Neovim
There is a tabline in Neovim. It shows all the opened tabs in your neovim.
You can show the tabline using the option showtabline. Set it to:
-
0to never show it, -
1to show only when there is more than 1 tab. Use it for small-screen devices. -
2to show the tabline always. Use it if you have a big screen and want your nvim to look fancy.
set showtabline=1
fig: tabline in vim/neovim - the top line showing tabs
How to turn off INSERT, VISUAL, and other messages shown at the bottom
By default, neovim shows its mode --INSERT--, --VISUAL--, --VISUAL-LINE--, etc. It can be spammy for some of you. To turn this feature use the option noshowmode:
set noshowmode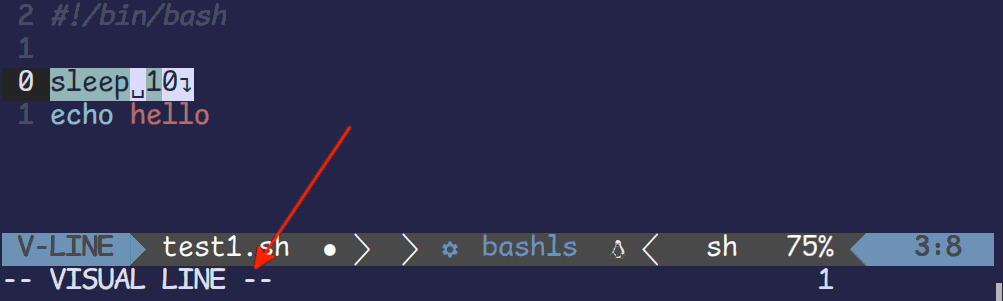
fig: mode indicator in vim/neovim
📓Recommendation: If you are just learning vim, don't turn it off.
How to prevent Neovim from creating a backup while overwriting a file
Neovim creates a backup when you write a file. Turn this feature off using
set nobackup
set nowritebackup
How to increase/decrease the time given to complete a shortcut
Neovim gives you, by default, 1000 ms to complete the mapped sequence. This might be a very long time for some. I have set it to 500. To reduce it, set the variable timeoutlen to something smaller like below:
set timeoutlen=500If you use the completion or autocompletion feature in nvim, use the following line as well, for the faster completion
set updatetime=300How to enable copy/paste between Neovim and the system clipboard
By default, neovim cannot access the system clipboard. To enable this access, use:
set clipboard=unnamedplusHow to make neovim case insensitive (ex - search)
To make neovim not to differentiate between lowercase and uppercase letter, set the option ignorecase.
set ignorecaseOne useful application: searching with lowercase letters using / will find uppercase letters as well. For example, if you search for the text hello, it will find Hello as well.
How to configure spell checking in Neovim
To turn it on for all files, use the command:
set spell!To turn it on for only specific filetypes (for example text files), use the following command:
autocmd BufRead *.txt set spell!
autocmd BufNewFile *.txt set spell!
Similarly, activate it for other file types.
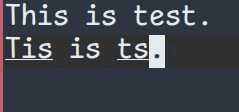
fig: spell check in neovim
fig: spelling suggested by vim/neovim
Now, you can find the wrong words highlighted/underlined by Neovim. To correct them, hit the keys z= while being over that, and a menu suggesting the correct spelling will appear. Choose the one you want.
📓 Recommendation: Turn the spell checking on only for markdown, and text files. Otherwise, almost everything even your codes will be horribly underlined/highlighted.
How to set spelling language in Neovim
To set the spelling language use the option spelllang. For example, to set it to the English of Great Britain, use:
set spelllang=en_gbPut all the languages separated by a comma in the above command.
How to get spelling suggestions as well in autocompletion in Neovim
To make neovim to show spelling suggestions as well during the autocompletion, use the option complete
set complete+=kspellBut please know that It works only on the file where spell check is on.
To learn more about autocompletion in Neovim, look at this article.
Some autocompletion options in Neovim
If you want to use autocompletion, you might find it useful to set the following options according to the below values.
To get an autocompletion popup menu shown even if there is only one item in the menu, use menuone.
Using longest will make the autocompletion menu to pre-chose the longest item in the menu.
set completeopt+=menuone,longestHow to stop the newline continuation of comments in Neovim
By default, when a line is a comment and we hit enter, nvim inserts the comment character at the beginning of the next line as well. I do not like this feature. You can disable it using the option formatoptions
set formatoptions-=croHow to highlight yank in neovim
By default, when you select a chunk of text and copy it using the yank key y, nothing is highlighted. But when you use the following Lua code, the selected text is highlighted for a very small time.
This is very useful in telling you that the text has been copied (especially while copying just one character like emoji)
lua << EOF
local highlight_group = vim.api.nvim_create_augroup('YankHighlight', { clear = true })
vim.api.nvim_create_autocmd('TextYankPost', {
  callback = function()
    vim.highlight.on_yank()
  end,
  group = highlight_group,
  pattern = '*',
})
EOF
Source: nvim-lua/kickstart.nvim
How to configure window title in Neovim
By default, window titles in Neovim are like settings.vim + (~/.config/nvim/general) - NVIM for the file ~/.config/nvim/general/settings.vim and ls(1) = (man:) - NVIM for man ls page.
To make it only show the required names and nothing else, use the following configuration
let &titlestring = expand('%:~') . ' — nvim'
autocmd FileType man let &titlestring = expand('%:t') . ' — nvim'
set title
Now, For the above two examples, it is ~/.config/nvim/general/settings.vim - nvim and ls(1) - nvim
To set titles in other formats look at the help pages using :help filename-modifiers command in neovim command Line.
⚔️ Conflict: Using FileType as given in the above code creates some conflicts with syntax on according to this StackExchange questions. However, you can restart your Neovim if you face any such problems and the conflict will disappear.
How to auto source init.vim after making any changes to it
When you make any changes to the file init.vim, these changes are not applied immediately to the Neovim. You need to restart Neovim or run :source $MYVIMRC.
But you can apply these changes immediately, whenever you save your file using :w. For this feature, include the following command in your init.vim:
autocmd! BufWritePost $MYVIMRC source %How to change working directories on selecting new files in Neovim
The option autochdir changes your working directory depending on what file is being selected by you.
You can open multiple files in various splits (using vertical and horizontal splits), in various tabs, and in various buffers. But at a time, you select only a file and work on that. Now, to change the directory to be the same as that of your working file, use the following configuration:
set autochdirNow, all the commands in Neovim : will apply only to this directory.
How to configure colors in Neovim
To tell Neovim that the background is in a dark color, use the background option.
set background=darkNow, based on the dark or white, Neovim sets the color.
⚔️ Conflict: Use this option, only if you are getting undesired colors. You might be using some plugins for your scheme. These plugins' configurations might conflict with it.
Other settings in Neovim
Set the following list of characters to be shown instead of the default ones. For example, space will be shown as ␣. This is helpful in codes where having extra spaces (or other characters) is not allowed.
set list listchars+=eol:↴,tab:>·,trail:-,extends:>,precedes:<,space:␣These characters will be highlighted depending on your color scheme. In my system, it is visible only in the visual modes, and in the cursor line in normal mode.
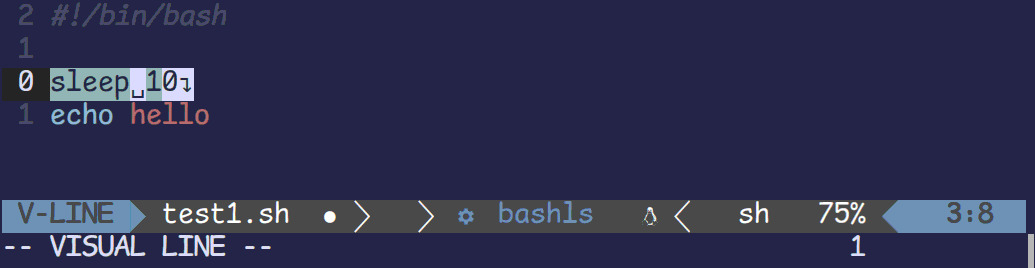
fig: highlight special characters in neovim
To learn more about highlighting, and Neovim colorscheme, look at this article.
Conclusion
That's all folks. This was just a basic configuration on Neovim. If you have any queries or suggestions leave them in the comment section below. And do not forget to help yourself using the help pages (execute the command :help your_help_text).
To configure Neovim more, look at this group of articles on neovim configuration.