Picom is a lightweight compositor that serves as a lifesaver for users of minimalist window managers like i3 and Openbox. As a fork of Compton, Picom brings smoothness and visual finesse to these window managers, which lack a built-in compositor. When you install these minimalist window managers without any compositor, you might face issues like tearing and stuttering when watching videos or switching between windows. Picom steps in to seamlessly address these concerns, ensuring a fluid and tear-free computing experience on your minimalistic setup.
Installation of Picom
ArchLinux/Manjaro:
pacman -S picomDebian/Ubuntu/Kali Linux/raspbian:
sudo apt-get install picomFor other distro, build and install using the official guide.
How to Launch Picom with Suitable Flags and Configuration
To launch Picom at system startup, you can add the following line to your ~/.xprofile or ~/.profile, depending on your system settings:
pidof picom 1> /dev/null || picom --config <configuration_file> &
Replace <configuration_file> with the name of the file where all of Picom's configurations are stored. Generally, it is ~/.config/picom.conf.
Alternatively, you can omit the configuration file if you provide all the desired configurations in the form of flags, as shown below:
pidof picom 1> /dev/null || picom --inactive-opacity=0.8 --fade-in-step=1.0 --fade-out-step=1.0 --fade-delta=1 --frame-opacity=0.5So, for example, if you have vsync = true in your configuration file, you will need to use --vsync to enable this feature.
However, I prefer the first method to avoid cluttering my ~/.xprofile or ~/.profile.
📔 Note: If you use i3, and are unfamiliar with ~/.xprofile or ~/.profile, you can also place the Picom command in i3's configuration file ~/.config/i3/config. To learn about i3 and its configuration, look at this article.
Here is the configuration that I have tested and found to work well for me:
# Shadows
shadow = true;
shadow-radius = 8;
shadow-opacity = 0.6;
shadow-offset-x = -3;
shadow-offset-y = -3;
shadow-exclude = [
  "class_g ?= 'i3-frame'"
];
# Fading
fading = true;
fade-in-step = 0.03;
fade-out-step = 0.03;
fade-delta = 4;
# Transparency / Opacity
inactive-opacity = 1;
frame-opacity = 1.0;
inactive-opacity-override = false;
detect-client-opacity = true;
focus-exclude = [ "class_g = 'Cairo-clock'" ];
opacity-rule = [
  "90:class_g = 'URxvt'",
  "97:class_g = 'Anki'",
  "70:class_g = 'i3bar'"
];
# General settings
backend = "glx";
vsync = true;
mark-wmwin-focused = true;
mark-ovredir-focused = true;
detect-rounded-corners = true;
detect-client-opacity = true;
refresh-rate = 0;
use-ewmh-active-win = true;
detect-transient = true;
detect-client-leader = true;
use-damage = true;
log-level = "warn";
wintypes:
{
  tooltip = { fade = true; shadow = true; opacity = 1; focus = true; full-shadow = false; };
  dock = { shadow = false; }
  dnd = { shadow = false; }
  popup_menu = { opacity = 1; }
  dropdown_menu = { opacity = 1; }
};
Now, I will explain each configuration option one by one.
How to Customize Shadows in Picom
There are several parameters related to shadow settings.
- Shadow Enablement:
shadow = true;This option allows you to enable or disable shadows. Setting shadow to true enables shadows, while setting it to false disables them. See figure 1.
Shadows can add subtle depth and dimensionality to graphical elements on the screen, enhancing the overall visual experience.
- Shadow Radius:
The shadow-radius parameter determines the blur radius for shadows, measured in pixels.
shadow-radius = 8;The default value is 12. A value of 8 indicates a moderate blur effect for shadows. Adjusting this value can change the softness or sharpness of the shadow edges. Higher values result in softer, more diffuse shadows, while lower values produce sharper, more defined shadows.
- Shadow Opacity:
The shadow-opacity parameter controls the transparency or opacity of the shadows.
shadow-opacity = 0.6;The range is from 0.0 to 1.0, with a default of 0.75. A value of 0.6 indicates that the shadows will be partially transparent. Modifying this value allows you to make shadows more or less prominent, depending on your preferences. A higher value makes shadows more opaque, while a lower value increases their transparency.
- Shadow Offset:
The two parameters, shadow-offset-x and shadow-offset-y, specify the left and top offsets for shadows, respectively. These offsets determine the position of the shadows relative to the objects casting them.
shadow-offset-x = -3;
shadow-offset-y = -3;
In the above snippet, both offsets are set to -3, which means that the shadows will appear slightly to the right and below the objects. Adjusting these values can change the direction and position of the shadows, allowing for precise control over their placement.
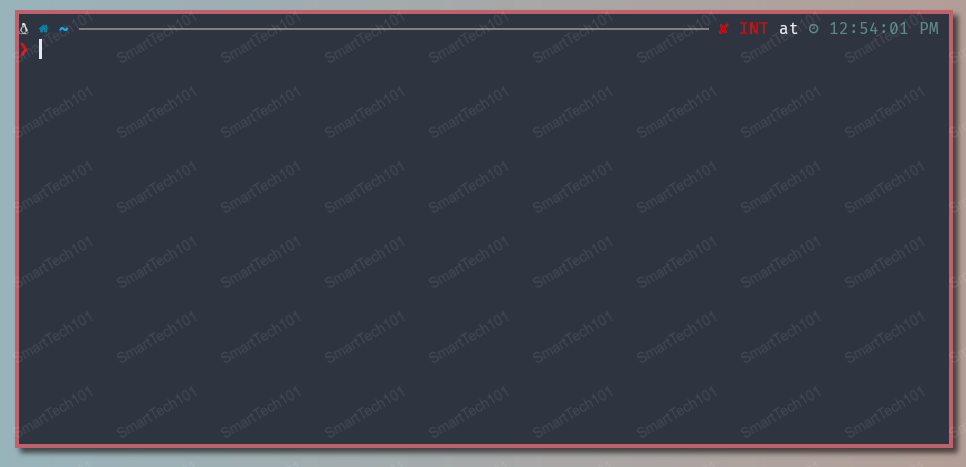
figure 1: notice how picom makes shadows only in the right and down to the window
There are more configurations related to shadows, such as excluding certain classes of windows from shadows. For details, refer to the man page.
Fading Windows When You Move Away from Them
Windows can be elegantly brought to life with smooth transitions, allowing them to gracefully fade in or out during both their opening and closing actions, as well as when their opacity undergoes changes.
To enable fading, set fading to true:
fading = true;To set the fading steps, use the fade-in-step option. The default value is 0.028:
fade-in-step = 0.03;This parameter specifies the time between steps in the fade sequence, in milliseconds. It must be greater than 0 and defaults to 10.
fade-delta = 4;Creating Transparency in Windows Using Picom
You can adjust the opacity of inactive windows (windows on which you are not working) using inactive-opacity, which has a range from 0.1 to 1.0. The default value is 1.0. Setting some transparency in inactive windows helps you identify on which monitor you are working on and thus it improves your productivity.
inactive-opacity = 0.8;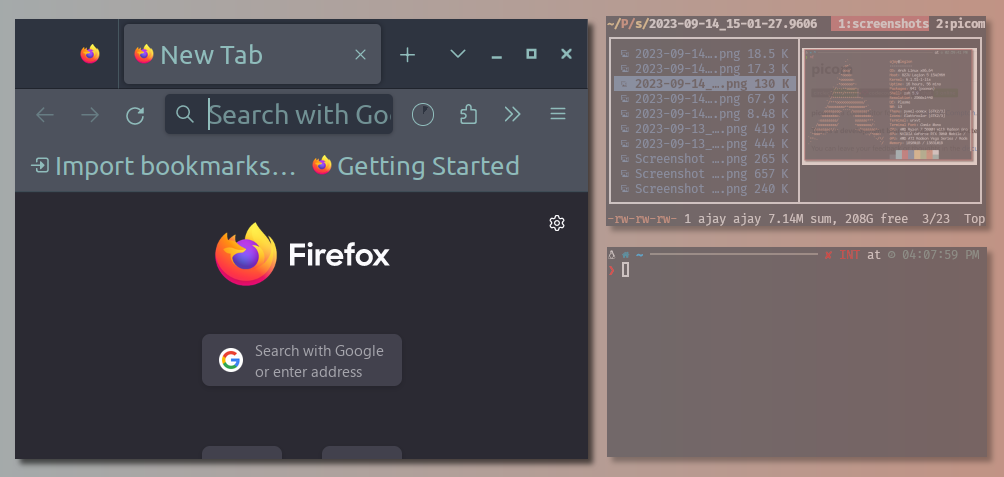
figure 2: setting some transparency to inactive windows helps you identify the focused windows
Similarly, you can adjust the opacity of active windows using active-opacity, which also has a range from 0.1 to 1.0. The default value is 1.0.
active-opacity = 1;Or, if setting transparency for whole windows is not your thing, you can set the opacity of only window title bars and borders. Use frame-opacity for this. Its range is 0.1 to 1.0, with 1 meaning to disable it:
frame-opacity = 1.0;You can also dim inactive windows. Its range is [0.0-1.0], with a default of 0.0:
inactive-dim = 0.0;You can also set opacity for different types of windows using the format PERCENT:PATTERN. For example:
opacity-rule = [
  "90:class_g = 'URxvt'",
  "97:class_g = 'Anki'",
  "70:class_g = 'i3bar'"
];
In the above figure, my terminal URxvt has a class of URxvt. The above snippet sets a 90% opacity for my URxvt windows, as you can see below:
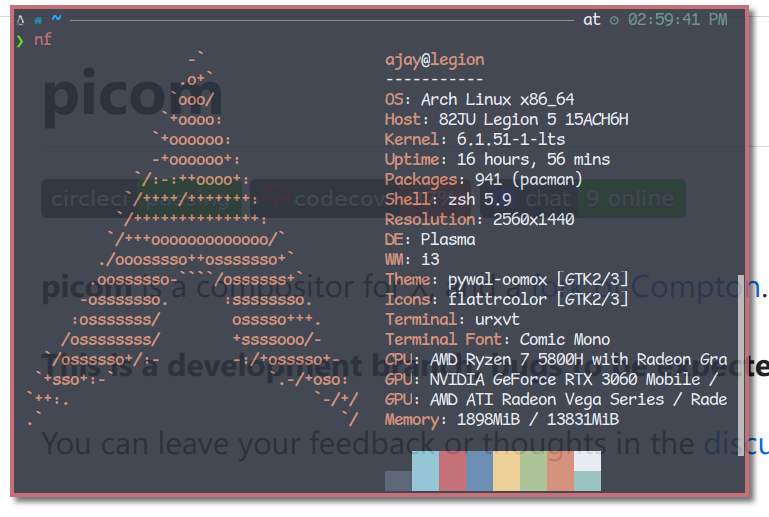
figure 3: setting transparency using picom
To find the class of your program, you can use the xprop tool:
[ajay@legion ~]$ xprop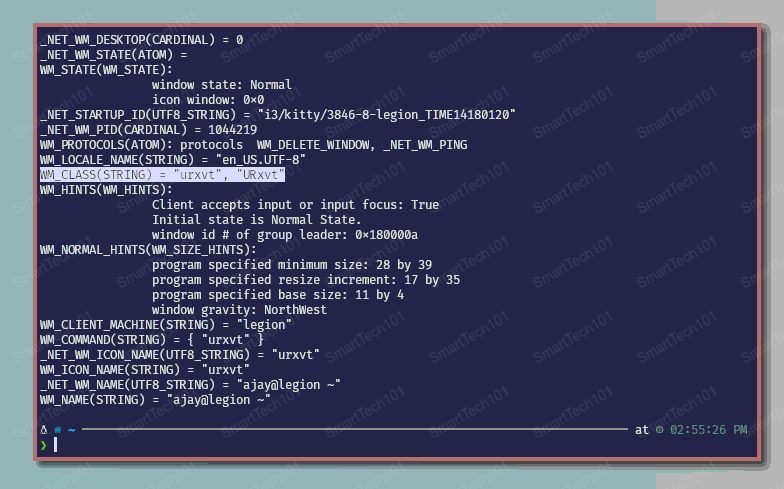
figure 4: xprop to find class of windows
Other Necessary Settings in Picom
Backend in Picom
Use backend to specify the backend to use. Available options are xrender, glx, or xr_glx_hybrid.
The default is xrender:
backend = "glx";The GLX backend is typically much faster but requires a compatible driver. It forces the usage of OpenGL.
Vertical Sync
Vertical sync is a primary feature needed to remove screen stuttering/tearing while watching videos or moving from one window to another. To enable it, set vsync to true:
vsync = true;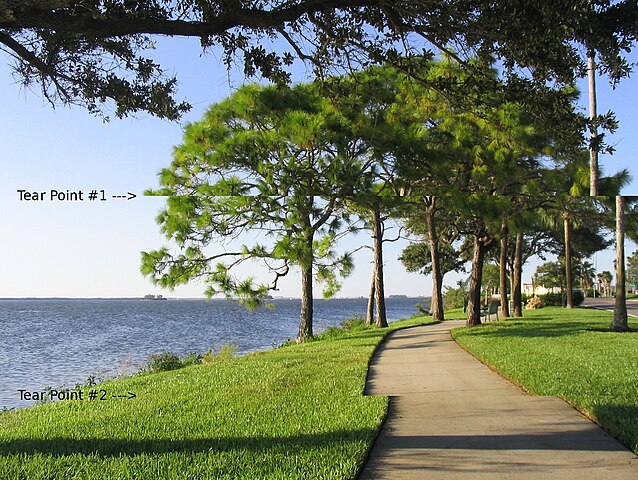
figure 5: screen tearing
Screen Refresh Rate
To specify the screen refresh rate, use refresh-rate:
refresh-rate = 60;Alternatively, you can set it to 0, in which case, Picom will attempt to detect it using the X RandR extension. I use 0.
Setting Different Configurations for Different Types of Windows
You need to use wintypes for this purpose.
In the configuration provided at the beginning, I used the following snippet:
wintypes:
{
  tooltip = { fade = true; shadow = true; opacity = 1; focus = true; full-shadow = false; };
  dock = { shadow = false; }
  dnd = { shadow = false; }
  popup_menu = { opacity = 1; }
  dropdown_menu = { opacity = 1; }
};
You can specify different options separated by a semicolon ; in curly brackets.
Available window types include "unknown," "desktop," "dock," "toolbar," "menu," "utility," "splash," "dialog," "normal," "dropdown_menu," "popup_menu," "tooltip," "notification," "combo," and "dnd."
Conclusion
That's all, folks. This is all you need to start working with Picom. There are more configurations that I have not covered. For further details, read the man page man picom. If you have any more questions or suggestions, please feel free to ask in the comments section below.